Chapter 2: Relational Database Management Systems
2.3 pgAdmin and PostgreSQL Exercise
Introduction
In this exercise we will go through the process of creating a simplified version of the IFRI database we discussed in class, using PostgreSQL (often called ‘Postgres’ for short) as the database engine using the pgAdmin software user interface to Postgres. We will establish primary and foreign keys to create a one-to-many relationship between tables, enter some data to test with and then finish by doing a query that joins two tables together.
Note that in this exercise, we’ll consider a research “Site” in the IFRI database to be a town, and in our data, Site 1 will be Amherst. The forests in this research visit will be three forest properties that our university owns.
Let’s begin!
1) Connect to your Postgres server
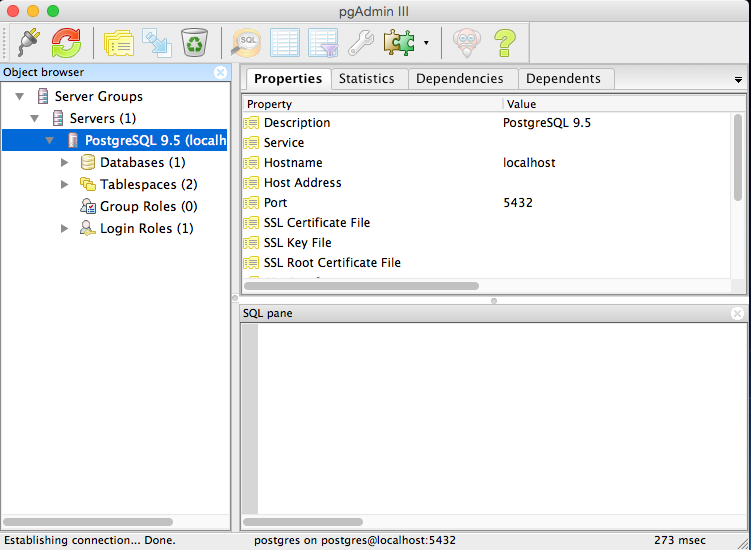
Right click on the PostgrSQL server listed in “Object browser” of your pgAdmin system. Select “connect” Enter your password (should be ‘server’) Your pgAdmin screen should look similar to Figure 1.
2) Create the ‘Site’ table in pgAdmin
Go to Object Browser Go to “Databases”, click on it to get context menu Select New Database
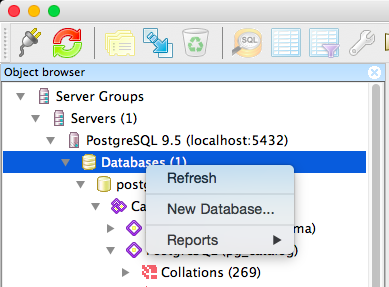
4) Enter your database name. In this case, for this exercise, “IFRI_DB”. Press OK.
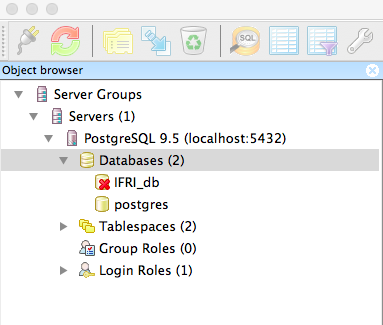
5) You should see the IFRI_db listed under the Databases object.
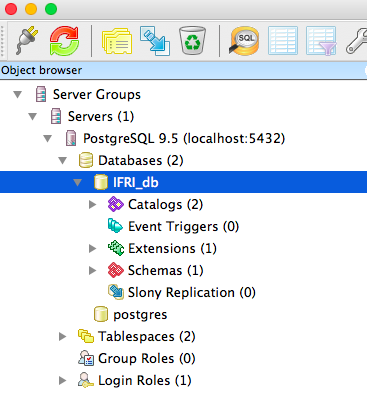
6) If you click it, and expand it, you can see that it has some already default objects in place, such as catalogs, Event Triggers, etc. We’ll ignore those items for now.
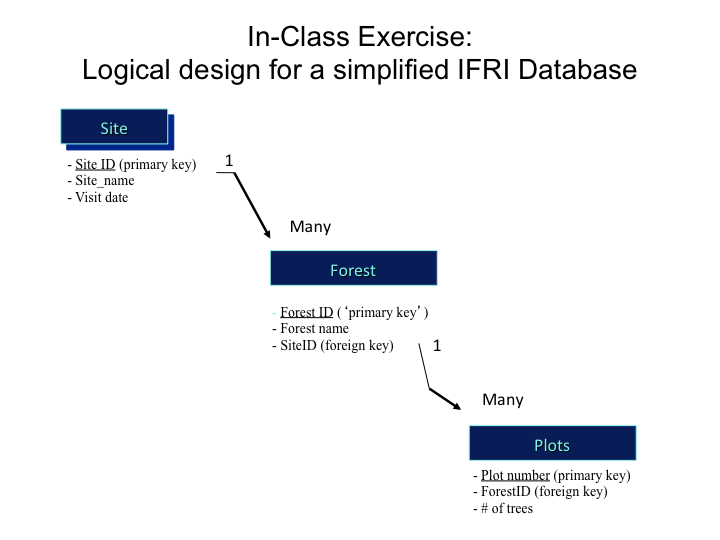
7) Now let’s add our tables following the portion of the IFRI database ER design shown in Figure 5, below.
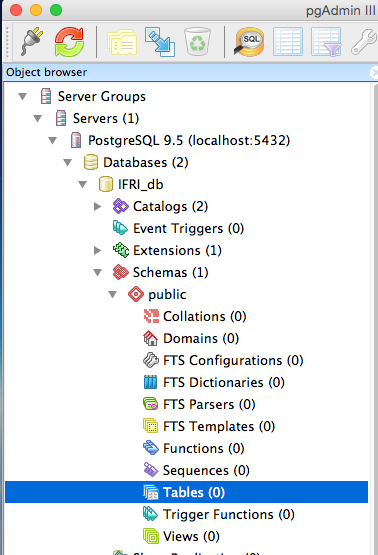
8) To do this, let’s select the Tables option under the “Schemas, Public” option as shown below.
What are Schemas in PostgreSQL? According to the PostgreSQL online manual:
“A database contains one or more named schemas, which in turn contain tables. Schemas also contain other kinds of named objects, including data types, functions, and operators…There are several reasons why one might want to use schemas:
To allow many users to use one database without interfering with each other.
To organize database objects into logical groups to make them more manageable.
Third-party applications can be put into separate schemas so they cannot collide with the names of other objects.
Schemas are analogous to directories at the operating system level, except that schemas cannot be nested.” (source: http://www.postgresql.org/docs/8.3/static/ddl-schemas.html).
What is the “public” part of schemas? By default, tables (and other objects) are automatically put into a schema named "public" in postgres. Every new database contains such a schema.
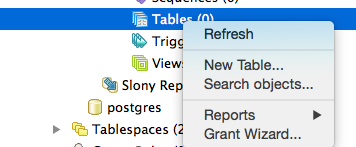
9) Click Tables, and choose New Table
10) Following our ER design (In Step 7, Figure 5), let’s create the first table, ‘Site.’ In the New Table dialog box, type in its name, ‘Site’.
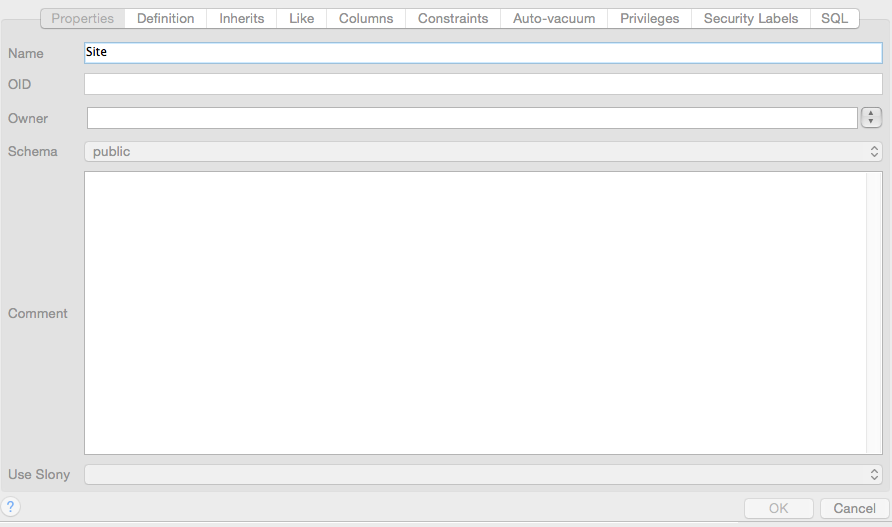
11) For simplicity, let’s give the new Site table two columns. Click the ‘Columns’ table at the top of the Table window, and press “add.”
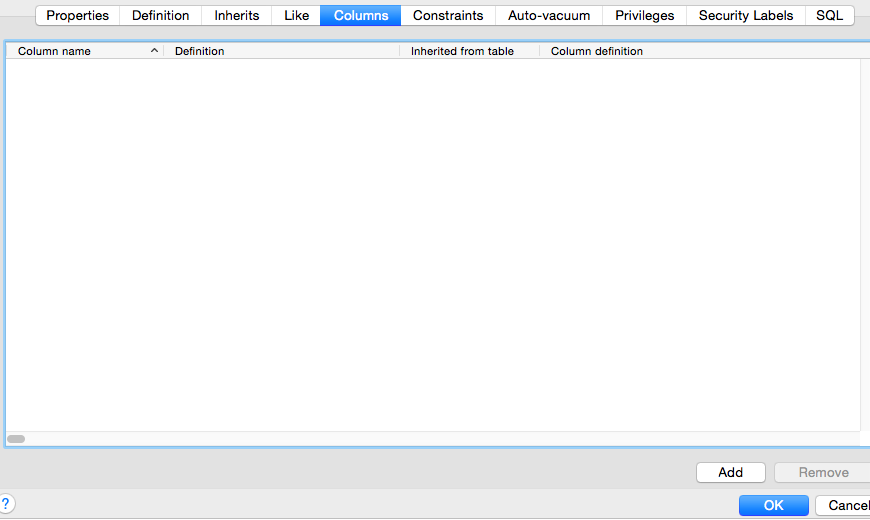
12) Add the following three fields:
Field name: SiteID (primary key)
Data Type: serial
(Note: the serial data type allows the field to be automatically incremented every time a new record is added. Serial is defined in Postgres as an integer field, but uses a ‘sequence generator’ to increment the values when new records are added to the table. For more information on postgresql datatypes, see http://www.postgresql.org/docs/8.1/static/datatype.html.)
Field name: Site_name
Data Type: character varying, length 30
Field name: Visitdate
Data Type: date
Now go to the “Constraints” tab. Note at the bottom it shows “Primary Key”. This allows you to specify the primary key for the table. Click “Add”, let’s call this “pk_siteID”
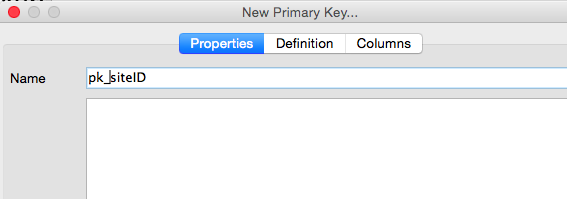
Next choose the “Columns” tab at the top, and associate the ‘pk_siteID’ primary key with the column ’SiteID’.
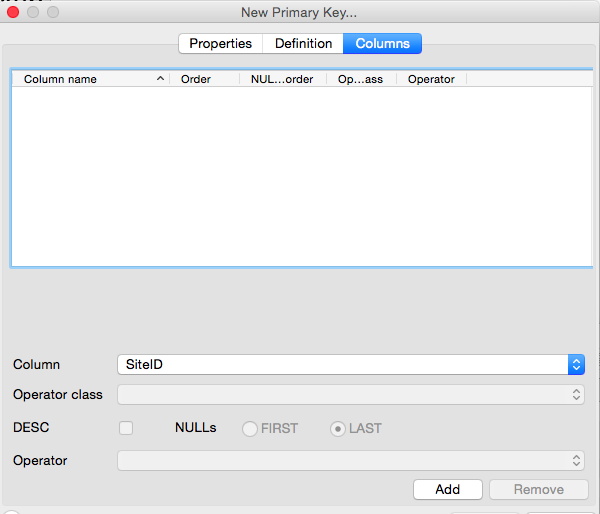
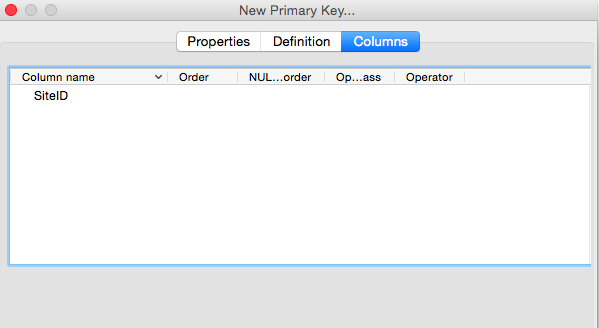
Click OK and you should now have these two columns in your Site Table, with SiteID identified as the primary key through the constraint name pk_siteID.
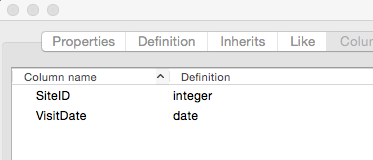
Now that we’ve established the fields for this table, their data types, and the constraint for the primary key to avoid duplicate records, click OK again to close the Site table construction.
13) Follow the same steps as above to add the second table in our design (Figure 5) — the ‘Forest’ table — with four fields:
ForestID, datatype serial (primary key)
SiteID, datatype integer
Forest_name, datatype character varying, length 20
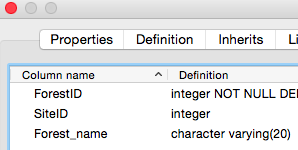
Make sure you set up the constraint and create a constraint called pk_forestID to set ForestID as a primary key.
Question to ponder: Why would we want this foreign key to be defined as ‘integer’ and not ‘serial’ like it is defined in the Site table? See Answer 1 at the end of this exercise.
14) Now add the third table in our simplified IFRI design, Plots
Plot_number, datatype integer
ForestID — Question: what should this datatype be, given it is a foreign key to create the relationship with the Forest Table? See Answer 2 below.
Tree_count, datatype integer
Like the other fields above, set up a constraint to establish pk_plot_number as the primary key constraint for field Plot_number. Hit OK.
You should now see three tables in your Postgres database similar to what is shown below.
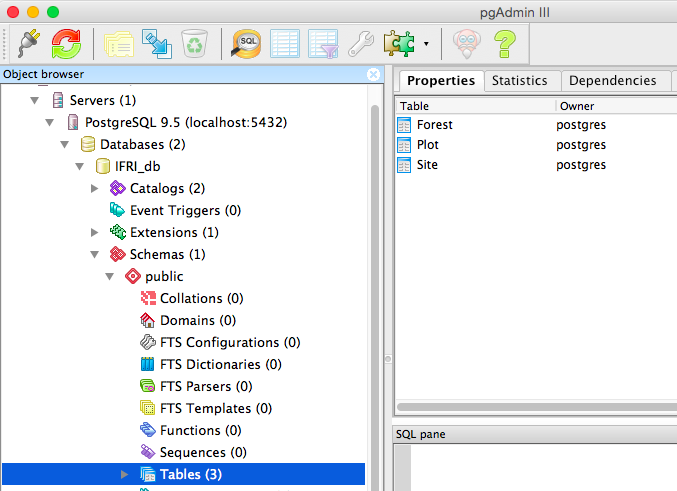
15) Using SQL to do this instead of the GUI
Note that we could have created any one or all of these tables using the SQL. To see this, let’s create a second, duplicate, Site table called “site2”.
Open up the Query SQL editor by pressing the query icon. 
If you need to, clear out any SQL text in the top part of the screen, and enter in (or copy and paste) the following SQL text (between the lines) into the SQL editor window:
CREATE TABLE site2
(

siteID serial,

visitdate date NOT NULL,

CONSTRAINT pk_siteID PRIMARY KEY (siteID)

)
WITH (

OIDS=FALSE

);

ALTER TABLE site2 OWNER TO postgres;
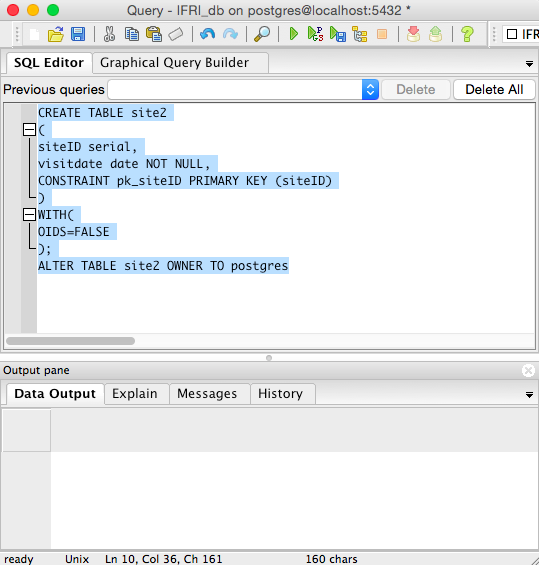
Let’s not worry about all the syntax above, such as the “OIDS=FALSE”, but this should provide a mental connection back to the SQL reading you did prior to this exercise. You should however be able to interpret the CREATE TABLE and the field definition lines.
Press the “run query” icon 
If the SQL is entered correctly, you should see in the lower ‘Output Pane’ a message that says:
“Query returned successfully with no result in 98 msec” or something similar.
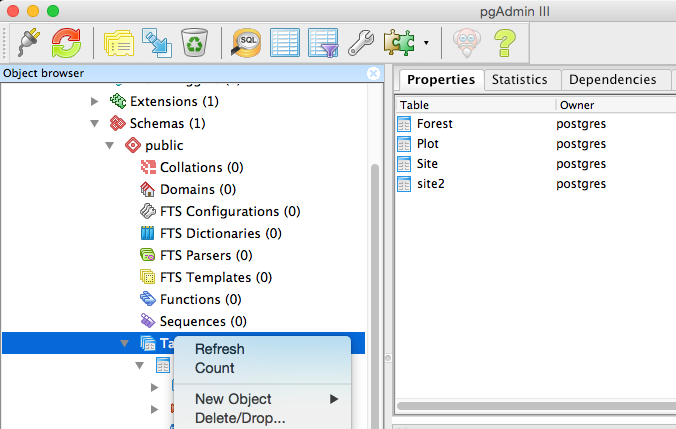
Close the Query window, and right click on your Tables in the Object browser. Choose “Refresh”. You should see the duplicate site2 table in your tables on the right.
16) Delete the site2 table — we don’t need it.
That SQL exercise above was to demonstrate how you do these types of commands using Structured Query Language (SQL). But our database doesn’t need the second site table (site2). So let’s delete it.
Make sure you have Tables chosen under the Object browser, and right click on the site2 table. On the context menu that appears (below), choose “Delete/Drop”. Say ‘yes’ when it asks are you sure you want to delete Public.site?
Your list of Tables should be down to the three we created using the pgAdmin GUI - Site, Forest and Plot.
17) Now let’s enter the data below.
Site table:
| SiteID | Site_Name | Visitdate |
|---|---|---|
| 1 | Amherst | 06/04/14 |
| 2 | Kathmandu | 5/5/15 |
| 3 | Lowell | 5/5/15 |
Forest table:
| ForestID | SiteID | Forest_name |
|---|---|---|
| 1 | 1 | Mt Toby |
| 2 | 1 | 5/5/15 |
| 3 | 1 | Savage Hill |
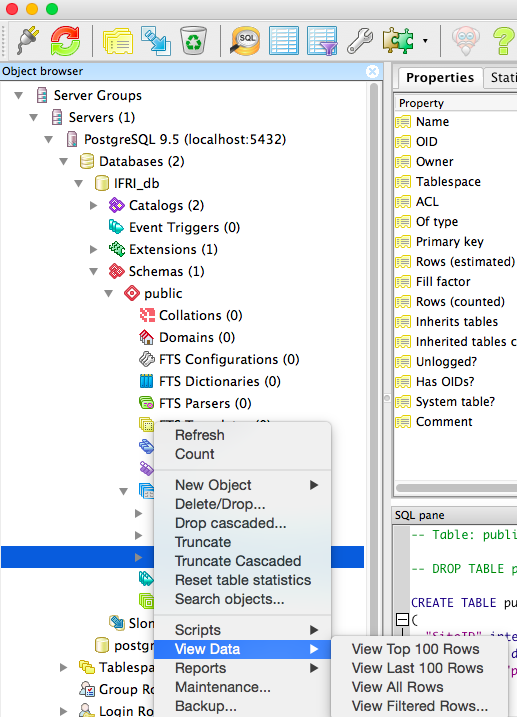
To enter the SiteID table data, click on the Site Table in the Object browser, choose View Data, and choose “View Top 100 Rows”
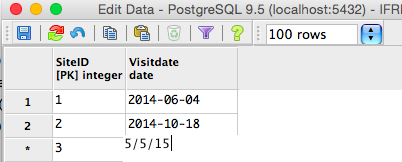
Enter in the Site data shown above. Notice that if you enter the date in the format above, it gets converted to a year, month, day format because of its ‘date’ data type definition (figure 22). Closing the view data window will save your changes. If you need to delete a row of data, you just right click and a context menu comes up allowing you to choose delete.
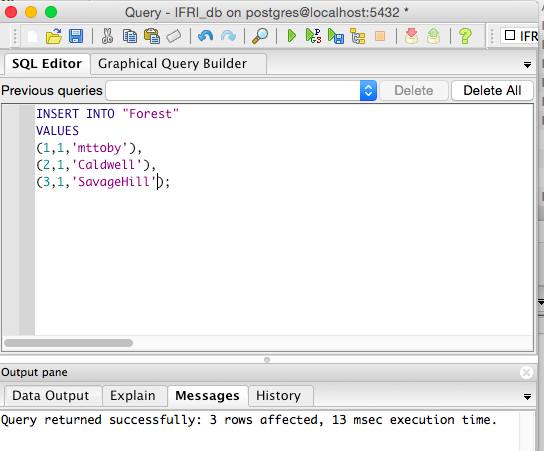
You can also enter data using the SQL language and pgAdmin’s Query Tool. For the Forest table data, let’s try this approach.
The SQL command to enter in (or append) is below separated by the lines.
INSERT INTO Forest

VALUES

(1,1,'MtToby'),

(2,1,'Caldwell'),

(3,1,'SavageHill');
Important: The values lists must be in the same order that you created the fields in the database!
Note the use of single straight quotes around text values; these are required, but not around numbers. The table name Forest could also be written "Forest", but this would only be required if it contained non-alphanumeric characters such as spaces, or if it had the same name as keywords such as INSERT.
Open up the Query tool, enter the above command (note that the character data such as MtToby needs to have single quotes around it to work), and press the “run query” icon (the little “play” triangle). If you are successful, your screen should look like below.
To double check and view your forest data, click on the Forest table in the Object browser, choose View Data and the View Top 100 Rows. Your table of data should look like below.
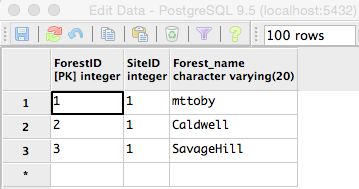
18) Querying data in multiple tables
So up until now, we’ve created the site and forest tables after designing them to have a 1-to-many relationship and we’ve entered data following that 1-to-many design. Our data is pretty limited, with simply one Site (UMass) with its three forest properties (MtToby, Caldwell forest and SavageHill forest). But to finish this exercise, let’s now query these tables together using the join capacity we have built into our database design.
Before we start a reminder question:
Question3: How did we create or implement that join in our ER model and in our table creation process? See Answer 3 at the end
To query these two we go back to the Query tool. However, rather than using SQL commands, we will use the Graphical Query Builder.
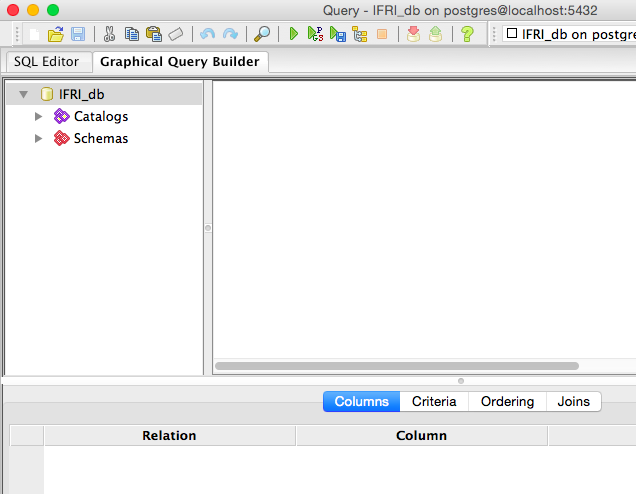
Suppose we wanted to run this query of the database: “Show me all the forest names for the site 1 (umass)”.
First choose the public Schemas.
Expand to see the tables (Forest, Plot and Site).
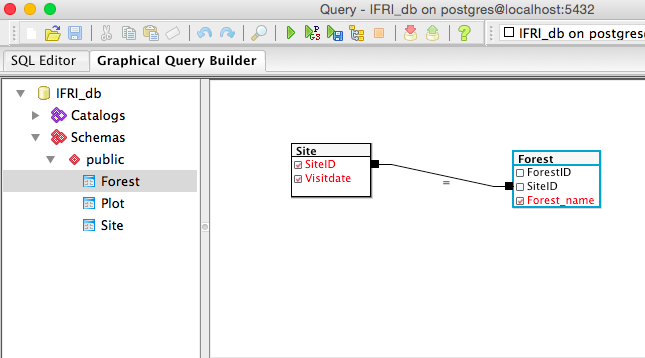
Click and drag the Site table into the open work area to the right.
Click on siteID, site_name, and Visitdate for this query. The selected fields should appear red (note: the figures below do not show site_name).
Click and drag the Forest table into the open work area to the right.
Click on Forest-name. This field should appear red.
Click and grab the primary key, SiteID in the Site table and drag it over the SiteID foreign key in the Forest table.
You should see a line connect between the two table boxes showing the join of the 1-to-many relationship. One site (Umass) has 1 or more forests.
Compare your screen to below.
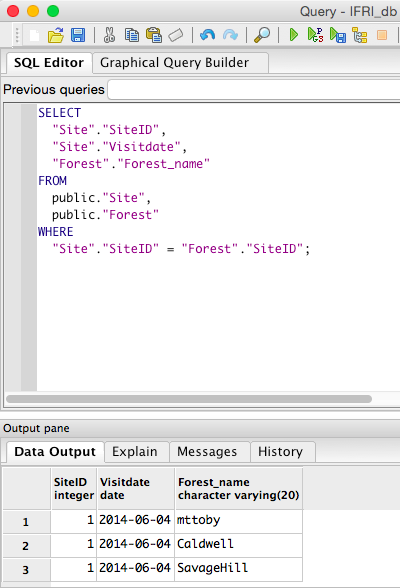
Now execute the query using the run query option (the little green play triangle). You should see in the Output Pane at the bottom the results of this query, showing the SiteID and visit date from the Site table, and the Forest Name from the Forest table (Figure 27).
Congrats!
IMPORTANT! Take a snapshot of your final screen, name it "Your Name Week 2" and upload it to our course management system (upload Week 2) to show evidence that you completed this assignment.
In conclusion, what you have learned in this exercise is the foundational tools for building a relational database in PostgreSQL using the pgAdmin interface. You’ve learned how to create tables, how to enter data, and how to run queries.
Up until now, these databases are non spatial. There are no GIS features (points, polygons, lines, etc.) in these databases. In the upcoming exercises, we will be learning about PostGIS, which works with PostgreSQL to make data spatially explicit.
If you finish this exercise with time to spare, or for more information specifically about PostGres, check out the official documentation on Postgres at:
http://www.postgresql.org/docs/current/static/index.html
Answers to questions
Answer Question 1: The SiteID in the Forest Table is a foreign key needed to make the 1 to many connection between the two tables. But remember that in the Forest table it is a foreign key, meaning that it is not a primary key that needs to be unique. In this database, any Research Site could have 1 or more forest areas defined by the people who live there. So if Amherst was Site 1, and Amherst has several different forested areas, then Site 1 could have multiple forested areas going by different names. SiteID in the Forest Table can’t be defined as serial because each of the Amherst forests should have the same SiteID number associated with Amherst. Consequently, SiteID should be defined as integer rather than serial. You don’t want it to increment every time a new forest record is added.
Answer Question 2: It should be integer, not serial. One forest can have one or more plots. So you don’t want ForestID in the Plots table to increment automatically.
Answer Question 3: We designed it using the primary and foreign keys. SiteID.